Showing posts with label yarn. Show all posts

Friday, August 24, 2012

Hooray for the Internet!

We have been doing a lot of job applying and a bit of traveling which has left little time for blogging!  Hopefully, we'll get together our pictures soon and post them.  But for now, links!

-Colleen
An elephants and hot air balloons carousel!
via Lou et Tom

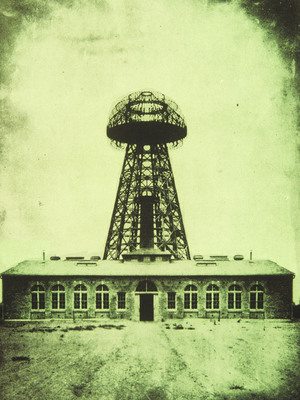
If you have not heard about the campaign for a Tesla Museum on Long Island, go read up on NPR!

Pickles has a new cardigan pattern.
And Knitpicks has a new bamboo/merino yarn that I can't wait to knit with!


Coffee Caviar without all the special equipment!
via Sprinkle Bakes


I want our next apartment to look like this kid's room!
via Vaiko

Sunday, April 22, 2012

Hair Bows, Two Ways

Knitting Patterns for Hair Bows

Two Ways to Knit Hair Accessories


After dyeing some yarn yellow with turmeric (see tutorial here) I had to come up with something to do with it.  I decided to knit some hair bows because I thought the yellow would go well with my dark hair.  I made up the patterns as I went along and here I am to share them with you!  I've never written a knitting pattern before, so feel free to make suggestions for changes.

Hair Bows, Two Ways

You will need for both patterns:
A small amount of light weight yarn (sock or sport works well)
Set of 4 DPNs of an appropriate size (this chart has great recommendations), I used 3mm
Yarn needle
Alligator clip or bobby pins

Both bows are knit in two pieces: a body and a center strap.  Finishing instructions differ for the two bows. Seed Stitch Bow is knit flat for both pieces while Stockinette Bow is knit in the round for the body and flat for the center strap.

Seed Stitch Bow


Make body of bow as follows:

Using two needles, cast on 7 stitches.

Row 1: k1, p1, k1, p1, k1, p1, k1

Repeat Row 1 until work is double the desired length of hair bow.  Mine was about 18 cm (7 in) long.  Bind off.


Make center strap as follows:

Using two needles, cast on 5 stitches.

Row 1: k1, p1, k1, p1, k1

Repeat row until strap is desired length.  To check, wrap around the middle of the body.  The strap should gather the bow so should be tight around it.  Mine was about 5.5 cm (2 in) long.  Bind off.

Finishing:

Seam together cast-on and bind-off rows of body.  Lay body flat so that the seam is in the middle of the back.  Wrap strap around the center of the body, over the seam, and seam together cast-on and bind-off rows.  Weave in ends.  If you have an alligator hair clip, you can sew or hot-glue it onto the back.  If not, use bobby pins to secure bow in hair.


Stockinette Bow


Make body of bow as follows:

Using two needles, cast on 14 stitches. Distribute stitches onto three needles and join to knit in the round.  Place marker to indicate end of round.

Round 1: knit to end of round

Repeat Round 1 until work is double the desired length of hair bow.  Mine was about 19 cm (7.5 in) long.  Bind off.


Make center strap as follows:

Using two needles, cast on 5 stitches.

Row 1 (RS): knit to end
Row 2 (WS): purl to end

Repeat rows 1 and 2 until strap is desired length.  The center strap will not be used to gather the bow very much so should be as long as double the width of the body.  My body was 3 cm (1 in) wide so my strap was 6 cm (2 in) long. Bind off.

Finishing:

Seam together cast-on and bind-off rounds of body.  Lay body flat so that the seam is in the middle of the back.  Using scrap yarn, gather body around the middle using running stitch (good tutorial here). Wrap strap around the center of the body with WS down, over the seam, and seam together cast-on and bind-off rows.  Weave in ends.  If you have an alligator hair clip, you can sew or hot-glue it onto the back.  If not, use bobby pins to secure bow in hair.


Monday, April 9, 2012

Dyeing Natural Fibers with Spices

Dye Natural Fibers with Spices

A Tutorial

Over the past few weeks, blogs and Pinterest boards have been abuzz with posts about natural egg dyeing.  After we dyed our eggs with beets, paprika, turmeric, and red cabbage, it seemed wasteful to dump the extra dye down the drain.  I took a handful of un-dyed wool and put it in the yellow (turmeric) dye, then went grocery shopping.  When I came home, I found that the wool had, indeed, dyed a beautiful yellow.  I saved the rest of the yellow dye (having dumped the others because they were a bit lumpy) and decided I would try more later.  


Today, I got out some more wool and two hanks of white, cotton yarn.  I prepared the yarn for dyeing by wrapping it around a book.  I cut about 6 pieces of scrap yarn and tied it around the strands at even intervals; this way, the yarn would not become tangled while dyeing.  Here are all the materials you will need to do this at home:

-un-dyed cotton and/or wool
-turmeric and/or paprika
-vinegar
-pots
-tongs
-rubber gloves
-fine mesh or a nylon stocking


I boiled two pots of water: one for turmeric and one for paprika.  Each pot had enough water to cover the yarn.  I added a few teaspoons of spice for each liter of water and one tablespoon of vinegar to each pot.  It definitely takes a lot paprika to make a darker color, but turmeric will work with less.  I mixed the spices in well then let the water come to a boil.  I then submerged the yarn in the dye and turned the temperature to low, leaving the dye to simmer for about 30 minutes.  You could make your yarn darker or lighter by changing the amount of spice you use or changing the length of time you leave it sitting.  Remove your yarn when it is several shades darker than what you would like. 


I used tongs to remove the yarn from the dye.  Wearing rubber gloves, I washed the yarn until no more dye came out.  I set the yarn to dry in the sun.


Next up: wool!

 I covered the pot of dye with a nylon stocking and poured the dye into another pan, trying to avoid letting any of the spice mix in.  This is because I did not want any spices to stick to the wool which is much more delicate  and harder to wash than the cotton.  


Once the dye had cooled to about the temperature of bath water, I carefully submerged the wool.  Next time, I will take greater precautions to fully submerge it.  Again, I let the wool sit for about 30 minutes.  After washing, I found that this was far too short!  Next time, I will leave it for at least an hour, if not several.

After soaking, I carefully washed the wool.  The water should be luke warm--no warmer, no colder.  This prevents the wool from accidentally felting. After the water ran clean, I set the wool to dry in the sun.


The results!  Turmeric turned both the wool and the cotton a pretty bright yellow.  The paprika made the wool a pale orange and the cotton a coral pink.

I will be using the wool for needle-felting, not for wet-felting, because I do not know how well the dye will stand up to washing.  As for the cotton yarn, I will probably be using it to make brooches or accessories--again, things that do not require washing.

Want to dye other colors?  Try the same techniques used for dyeing Easter eggs (this link has a good explanation of different colors you can make)!

Next up: vegetable dyes!

-Colleen

Saturday, February 11, 2012

Groundhog Day Cowl

Groundhog Day Cowl

A Late-Winter Scarf Pattern

Newly Finished Scarf!
 Let this be the first of many posts about knitting!  Last summer, I got one skein of this amazing wool while I was in Vienna picking up a visa.  The yarn is Jawoll Magic from this lovely little shop.  One skein was more than enough for this scarf.  I have a large scrap ball left over that I am probably going to make into some baby socks for sock-making practice.  I've looked online at prices and found that it's much more expensive from any online shop (~15 Euros) than where I purchased it in Vienna (8 Euros).  So, if you ever find yourself in Vienna, definitely hit up A. Christian.  They may not speak any English but they are very helpful with their hand motions! 

Two Wraps
I had been saving this yarn for months, trying to find the perfect pattern for it.  I had pretty much given up on knitting anything with it before it got too warm for wool--and then winter hit for real.  When Punxsutawny Phil predicted 6 more weeks of winter, I cast on a modified Dayflower Cowl.

Three Wraps For Maximum Warmth!
Though the pattern makes it big enough for one wrap around your neck, I tripled it so that I could have a nice warm scarf.  My exact specs are on Ravelry.  (If you're not familiar with Ravelry and cannot see these links, go ahead and sign up!  It's an incredible resource for knitters.  I cannot advocate for it enough!)  

Pattern Close-Up
I'm not generally a fan of variegated yarn, especially with lacework--but the lines in this are so subtle that I don't mind.  I love the bluebell-esque flowers in this lace.  After spending the winter making two pairs of mittens that were heavy on the color work, this lace was a nice escape.  

And so, I've come to accept that lace is where my heart lies even if I'm always eyeing a fair isle pattern.