Showing posts with label cooking. Show all posts

Saturday, May 26, 2012

Saturday Afternoon

Glimpses of Our Saturday Afternoon


This Saturday, there is laundry drying in every corner of the apartment.  Somehow it's been weeks since we last washed our clothes.  Jeans are in the windows, dresses hang from the rafters.


While Amy is busy writing another paper (unfortunately, being finished with her thesis does not mean being finished with her degree), I have been making cupcakes!


The sun is shining on our bean plants which keep taunting us with bulging but not-quite-ready-to-pick pods.

Today has simply been lovely!

Sunday, May 20, 2012

Hooray For The Internet!

I have had an exciting week over here! I finally finished my Master's dissertation. It feels really good to not have to worry about it anymore and I think that it turned out very well. I am most excited about the extra free time I have now. This summer will be filled with adventures around Prague and quite a lot of travel!

This week, I have found some interesting links to share with everyone--including some very special elephant pictures! I hope that you enjoy!!!


Post of tips on gardening, there is good advice on planting a garden without a lot of space.
via A Beautiful Mess
I have been falling in love with brightly colored refrigerators lately.
via Deco Photo Blog
Silk ribbon embroidered flowers!
via Dear Friend's guest post on  Little Chief Honeybee
This picture of elephant and hot air balloons is perfect for our blog!
via La Carpa on tumblr
Instructions for building your own tent on the beach.
via Apartment Therapy
Love this picture of San Francisco.
via Poppytalk
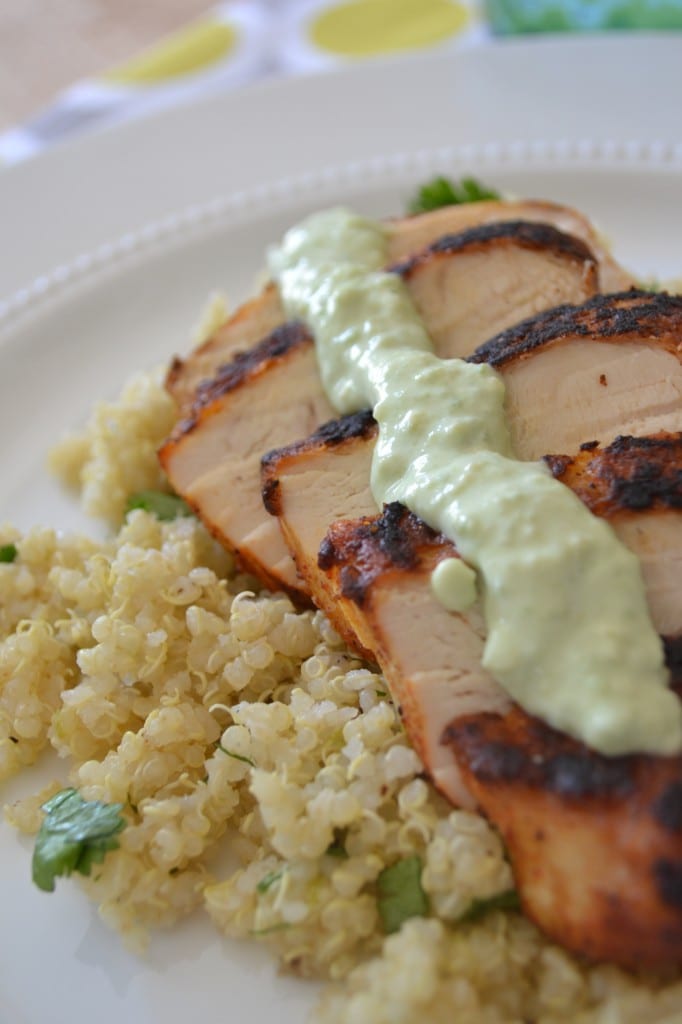
Recipe for blackened chicken and Cilantro Lime Quinoa.
via Sarcastic Cooking
These two are too cute!
via Jadore Simone at tumblr


<3 Amy

Saturday, May 12, 2012

Cookie Dough Brownies

Cookie Dough Brownies

A Mix of Recipes

Recipe for Cookie Dough Brownies

This recipe for cookie dough-topped brownies had been on my mind since Amy posted about it a few weeks ago.  However, when I looked at the recipe, I thought there were a few things I would change about it.  I thought the best way to start would be to go to my favorite brownie and chocolate chip cookie recipes and go from there to combine them.  

Brownie Layer:

For the brownies, I modified this Martha Stewart recipe for Double-Chocolate Brownies.  It is my go-to recipe.  For the purposes of making Cookie Dough Brownies, I cut the recipe to two-thirds, figuring I wanted a thin brownie layer.

The Process of Baking BrowniesIngredients:
5 tablespoons of butter, cubed
100 grams of semi-sweet chocolate (~ 3.5 oz), broken into pieces
1/3 cup of sugar*
2 eggs
3 tablespoons of cocoa powder
1/4  teaspoon of salt
5 tablespoons of flour

*I usually cut the amount of sugar in any recipe in half.  I really dislike things so sweet that you cannot taste anything else.  For sweeter brownies, use up to 2/3 cup of sugar.

Preheat oven to 350 F (180 C).  Line a 9x11 inch pan (or something of similar size) with parchment paper so that the paper goes all the way up the sides.  Trim off excess and put aside.  
In a double boiler, melt butter and chocolate, stir until smooth.  Remove from heat.
Pour sugar into a medium sized mixing bowl, pour chocolate mixture on top and whisk until well-combined.  Add eggs, one at a time.  Add salt.  Gradually whisk in cocoa.  Fold in flour until just combined.  Pour into pan, using a spatula or rubber scraper to evenly distribute.  The batter will be quite viscous and will form only a thin layer in the pan.  Bake 15-20 minutes.  Test the center with a toothpick; if it comes out with only a few crumbs, the brownies are fully cooked.  
Set aside and make cookie dough.


Cookie Dough Layer:
The obvious choice for a cookie dough recipe seemed to me the old standard: Toll House.
These cookies have an important ingredient missing from the original Cookie Dough Brownie Recipe...
SALT!  You cannot have all of that sugar without some salt to balance it out!  
Here is my recipe, cut in half to make a reasonably-sized layer, and altered to remove the eggs but not the moisture.

Baking Chocolate Chip Cookies
Baking is Messy

Chocolate Chip Cookie Dough is Delicious
But Totally Worth It!


Ingredients:
1/2 cup of butter, softened
1/2 teaspoon of salt
1/2 cup of brown sugar (or turbinado here in Europe, which is the closest I can find)
1 package of vanilla sugar (here in Europe, or 1/2 teaspoon of vanilla and 1 tablespoon of sugar)
2 tablespoons of milk
1 cup of flour
100 grams of semi-sweet chocolate (~3.5 oz), finely chopped*

*You could obviously use chocolate chips, we just do not have them here.

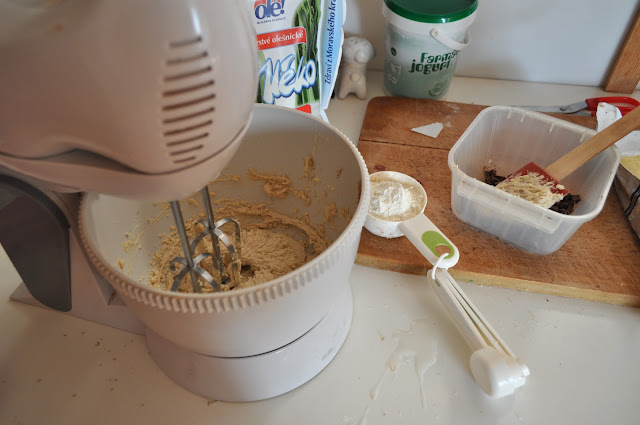
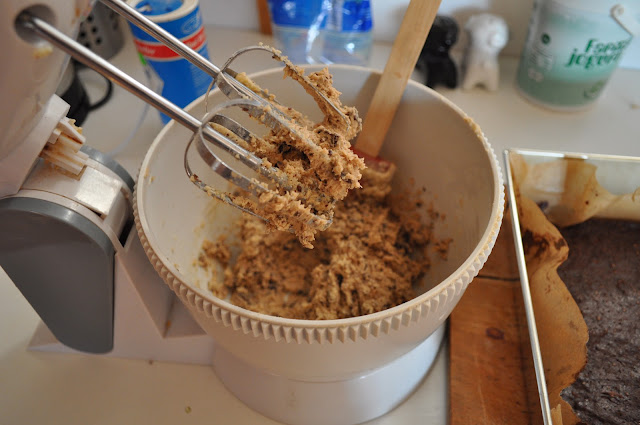
Using an electric mixer, cream butter, salt, sugars.  If using, add vanilla extract.  Add milk and mix until combined.  Gradually add flour and mix.  Mix in chocolate.  

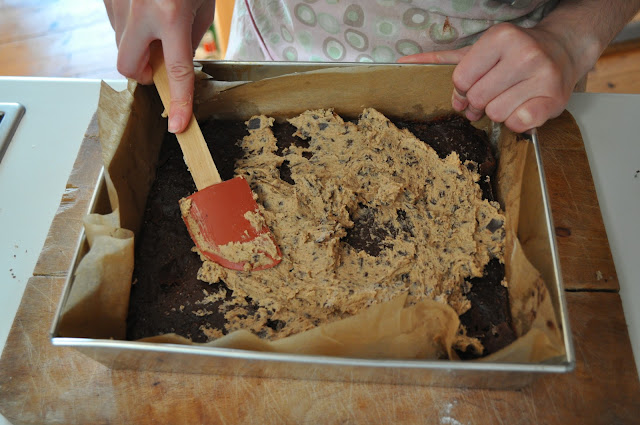
How to make chocolate chip cookie dough brownies

Combine:
Using a spatula or rubber scraper, spread cookie dough over brownies.  You may even want to warm the dough a bit to make it more pliable.  DO NOT MELT!  Once the dough is spread evenly, place in refrigerator for about an hour to set.  Remove and cut into reasonably-sized pieces--whatever that means for you!  Serve with a glass of milk, you will need it.

I hope this recipe inspires you to go out and make some delicious treats!  

Friday, March 16, 2012

Hooray For The Internet!

Welcome to a new weekly feature:

Hooray for the Internet!

Just your standard Links-Round-Up of neat things found around the internet this week. While we will try to stay topical and post recent things, sometimes one comes across an old blog post that is too good not to share. Amy and I will be taking turns posting our favorite finds of the week.  Expect mine to be mostly crafts.  Amy's will probably include a bit more fashion.  Without further ado, my links of the week:


Thirteen Ounces or Less on  Giverslog--What Amazing Things Can You Mail Without a Box?
Did you know that you can mail anything under 13 ounces (and within certain size parameters) without a box?  Just apply a packaging label and sufficient postage, then drop it in a mailbox!  Check out the 13 Ounces or Less tag over at Giverslog for all kinds of postal inspiration.  Spread some Easter joy by mailing plastic Easter eggs


Dutch Bike-Bus on Treehugger
Since I first saw the image of this bike-bus on Treehugger, I have been thinking about it all the time.  It is on my theoretical vision board for the future.  Could you think of a better way to get kids to school?  Exercise, green-living, teaching children responsibility and respect for the environment--you know, all those popular ideas--are all encompassed in this!  At only $15,000, I kind of want one.


BEES! by artist/blogger Hannah Haworth
These life-size bees by  Hannah Haworth are so adorable and intricate.  I have so much respect for her work!  Check out her website for other amazing (sometimes knit) artwork.


Paper Hot Air Balloon from Kiosk
I want one of these hot air balloons.  That is all.

Paper Flower Tutorial from Say Yes to Hoboken
This tutorial is from around Valentine's Day; nevertheless, I think it these flowers would be a beautiful spring/Easter decoration.  


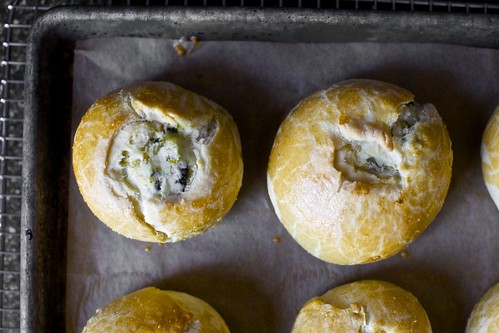
Knishes on Smitten Kitchen
These potato knishes are a much classier, and probably tastier, version of my favorite potato snack that I could usually find at the back of our freezer.  I'm thinking about actually making some next week.  Smitten Kitchen always has such amazing recipes for comfort food that I often think the tag line should be, "tastes like childhood, only better."


Check back next Friday for Amy's links of the week!


Thursday, March 15, 2012

Hamantaschen

Hamantaschen

A Treat for Purim


This post is a bit late for Purim but these cookies are worth reporting about.  The recipe comes from Smitten Kitchen and has been altered a bit to suit ingredients available in the Czech Republic in general and our pantry specifically.  

Ingredients: 
8 tablespoons unsalted butter, softened
6 tablespoons tvaroh*
3 tablespoons icing sugar 
1 egg
1 teaspoon vanilla extract
1 1/3 cups plus 4 teaspoons flour
1/4 teaspoon salt

Filling (I used poppy seed filling mix, though one could also use jam).  
*The recipe calls for cream cheese.  Though it is not impossible to find here, it is rather expensive and I figured I would try a more Czech alternative.  Tvaroh is similar to quark, a fresh cheese popular in Central and Eastern Europe.  It can be creamy or crumbly and is often referred to as "curd."  I chose to use a creamy, high-fat tvaroh because it is most similar to cream cheese.


Cream together butter and tvaroh until smooth.  Then add sugar and continue to mix for one minute.  Add egg, vanilla, and salt.  Mix until combined.  Gradually add flour until a smooth but slightly sticky dough comes together.  The dough has a distinct pastry feel to it--not as light as bread dough but not as heavy as cookie dough.  You may need to add up to one tablespoon of extra flour if the dough is too sticky.  

Make a disc, as you would for sugar cookies, and wrap in plastic wrap.  Refrigerate at least one hour while you prepare the fillings.

I love this poppy seed filling!   There's even a recipe on the back, just like grandma used to make.  This is a mixture of ground poppy seeds, sugar, and starch that makes it thicken up into paste when water is added. 

Poppy paste! Yeah, I bet all of you trying to make hamantashcen in America are jealous of how easily one can get poppy paste here.  And I'm jealous of how easily one can get Cheetos there.  So we're even.

After the dough has been refrigerated, roll it out on a floured surface to about a quarter of an inch thick. This is when most people use fancy circular cookie cutters.  The ring of a ball jar works just as well.  And don't lie, if you are reading this, you probably own more ball jars than cups and definitely more ball jars than circular cookie cutters.  They also come in convenient sizes.  Use a regular ring for smaller hamantaschen and a wide-mouth ring for larger, more traditional cookies.  

Meanwhile, preheat oven to 350 F (170 C).

Place a small spoonful of filling in the middle of the circle.

 Pinch closed three corners to make the shape of a tri-corner hat.  This first batch, I only pinched it a little bit and avoided covering the filling.  You will see that when they came out, they had mostly unfolded themselves.  The next batch, I pinched them so hard that I almost covered the filling and they stayed pretty triangular. 


Place cookies on a parchment-lined baking sheet with a fair amount of space between them because they do rise.  

Bake for about 20 minutes, until the dough is golden brown.  

As you can see, these turned out a bit too puffy and not very triangular.  Delicious, nonetheless.  Store in an airtight container.  

Sunday, February 19, 2012

Granola

Granola

A Make-It-Up-As-You-Go Recipe


Last month, a discussion was had in our flat.  It went something like this: 

Amy: You know what is a delicious and healthy breakfast food that can be eaten with yogurt to increase your calcium intake and ensure you are getting enough good bacteria?
Colleen: Hmm, cereal?  Cereal is so expensive here and sugary!
Amy: No, granola! 
Colleen: Boy howdy are you ever right!  We should make some!
Amy: Make granola?  How does one make granola?
Colleen: Well, it's easy!  You just mix up whatever seeds, nuts, and dried fruit you like with oats, honey, and oil; then you bake it.  

I may be paraphrasing.  There may have also been a discussion which followed like this:

Colleen: What do you like in your granola?
Amy: I don't know, the normal stuff.
Colleen: Dried fruit?
Amy: No.  The other stuff.
Colleen: Seeds and nuts?
Amy: Yeah, I guess.  And the crunchy stuff.
Colleen:  What kind of seeds and nuts?
Amy: I don't know, the normal ones.

Here's what we settled upon:

Gather Your Ingredients.
Most Stuff Should Be in Jars. If You Are Making Granola, You're The Kind of Person Who Stores Everything In Jars.


These measurements are difficult to quantify, but here's a try:
2-3 cups of oats (not quick-cooking)
1/4 cup of nuts
1/4 cup of large seeds
2 teaspoons of small seeds
2 tablespoons of wheat germ
3 tablespoons of honey
1/3 cup of oil
pinch of salt
pinches of sweet spices


For the nuts, we use almond and cashews because that's what we like.  I prefer the nuts chopped up.


Toss your nuts in the bowl, add in your oats.  As you can tell, I'm not one for measuring.  


Add in some wheat germ.  This is not a requirement as it does nothing for flavor; however, it adds lots of healthy stuff!  


Next, add some seeds.  We use lots of pumpkin and sunflower seeds (shucked, obviously) and a few teaspoons of poppy and sesame seeds.  


Add in honey, about three tablespoons.  It's better to under-sweeten than over-sweeten, though.  You can always put honey on top when you are eating it.  If you do not eat honey, for whatever reason, you can also use maple syrup-- though the flavor definitely comes through in the granola and you need much less than honey.  Then, add oil.  It takes more oil than you think, about a third of a cup! 


That's almost everything!  Add in a pinch of salt.  Then, add in pinches of your favorite sweet spices. I use cinnamon, nutmeg, cardamom, and allspice.


Mix it up!


Spread your granola on a cookie sheet lined with parchment paper.  Be sure not to pile it too high; you may have to bake it in two batches.  I am always sure to leave some clumps, though, ensuring that there's plenty of "crunchy stuff."

Bake at 350F (170C) for about 10-15 minutes, mixing with a spatula halfway through.  The granola is done when the oats are a little brown and the seeds or nuts looked cooked.


Store in an airtight container and it lasts for a few weeks.  If you do like dried fruit in your granola, you can add it before or after baking.  If you have raisin-picker-outers in your house, it's good to store the dried fruit next to the granola and mix it in when you want it.